Configure Infoblox Grid Manager for Use with Nevelex Labs' Security Flow
To configure Infoblox Grid Manager to work with the Security Flow Infoblox DDI Plugins versions v0.7.0 and higher, please follow the following instructions. These instructions define the basics for creating a RPZ and an Extensible Attribute for storing the Security Flow Incident ID number.
Infoblox provides a similar guide for setting up a DNS Firewall. Watch the following video to quickly learn how to configure Infoblox, configure an Infoblox DDI Plugin Instance, and add entries to a RPZ using a basic flow. However, the detailed configuration instructions are below.
Create a Local Response Policy Zone (RPZ)
- Navigate to
Data Management=>DNS=>Response Policy Zones. - Click on the '+' button to bring up the RPZ Wizard.
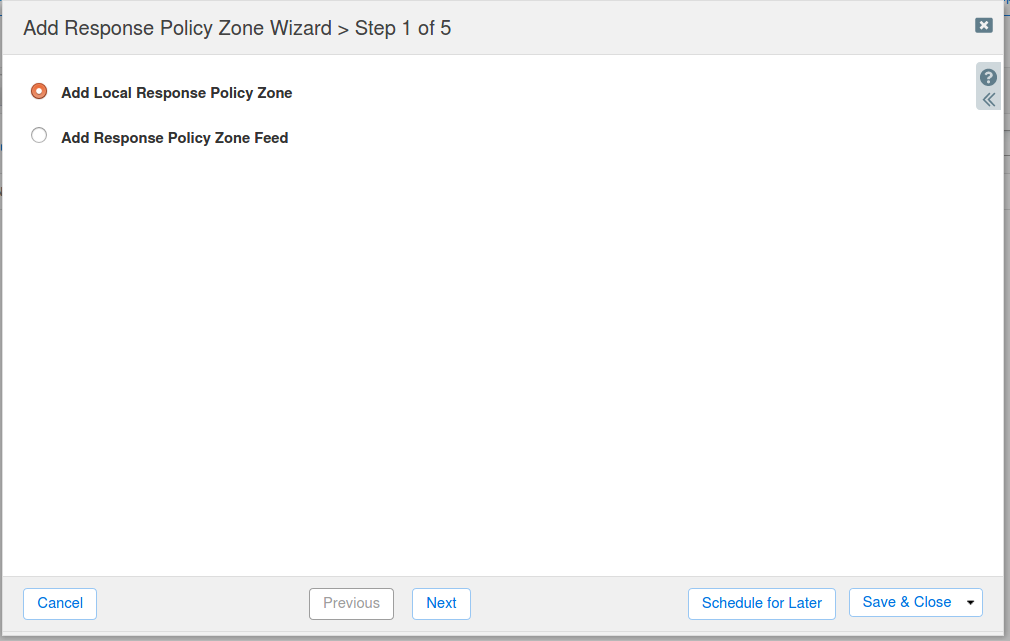
- Select
Add Local Response Policy Zoneand clickNext.
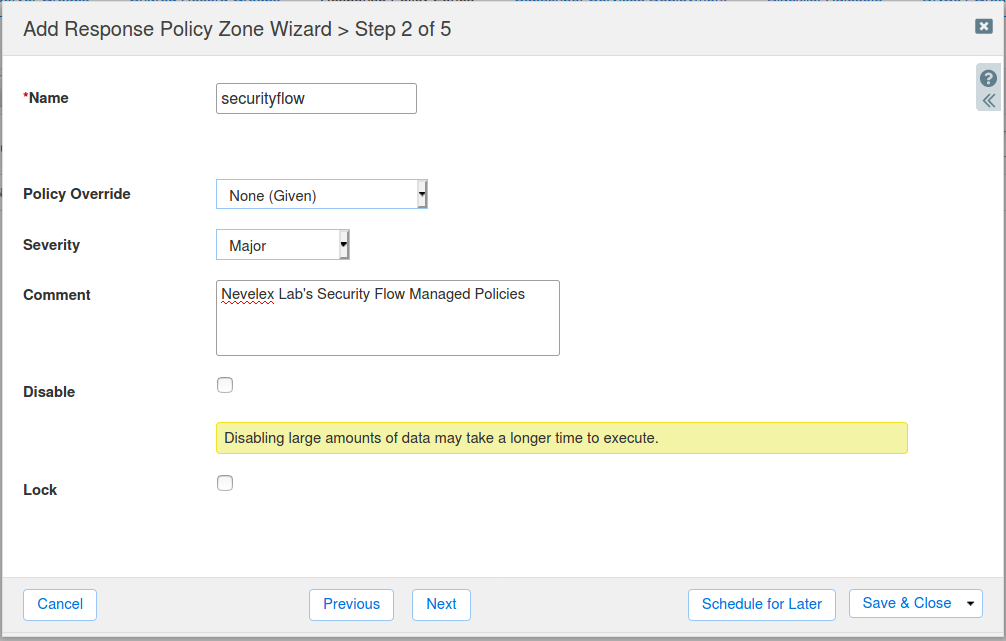
- Fill out the fields in Step 2 to define a Security Flow RPZ and click
Next. In this example,securityflowis the name of the RPZ.
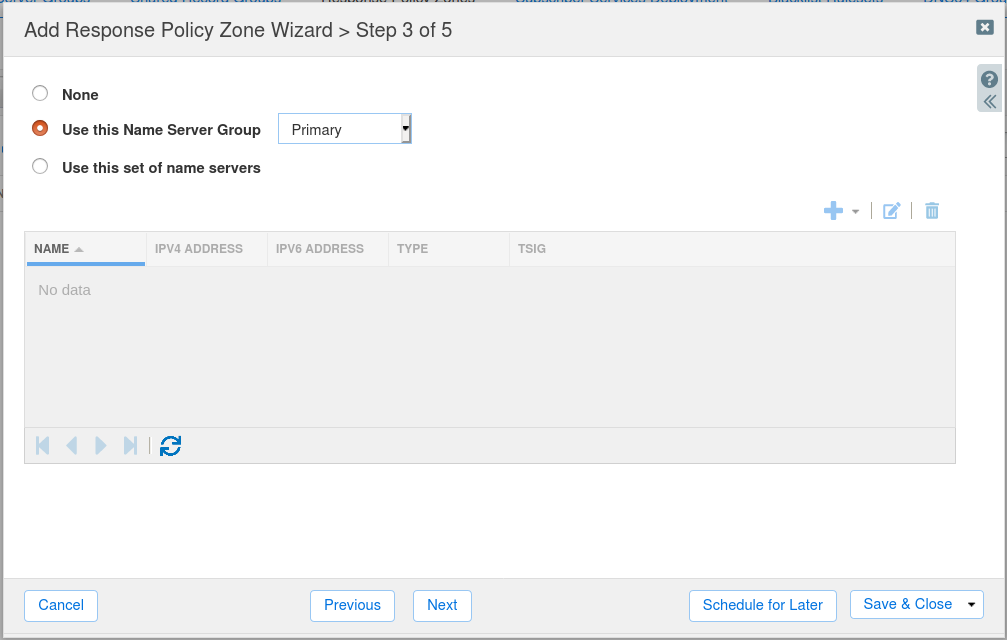
- Fill out the fields in Step 3 to define the DNS server(s) to use and click
Save & Close. In this example, a Name Server Group ofPrimarywas used.
Optionally Define an Extensible Attribute
- Navigate to
Administration=>Extensible Attributes. - Click on the '+' button to bring up the Add Extensible Attribute Wizard.
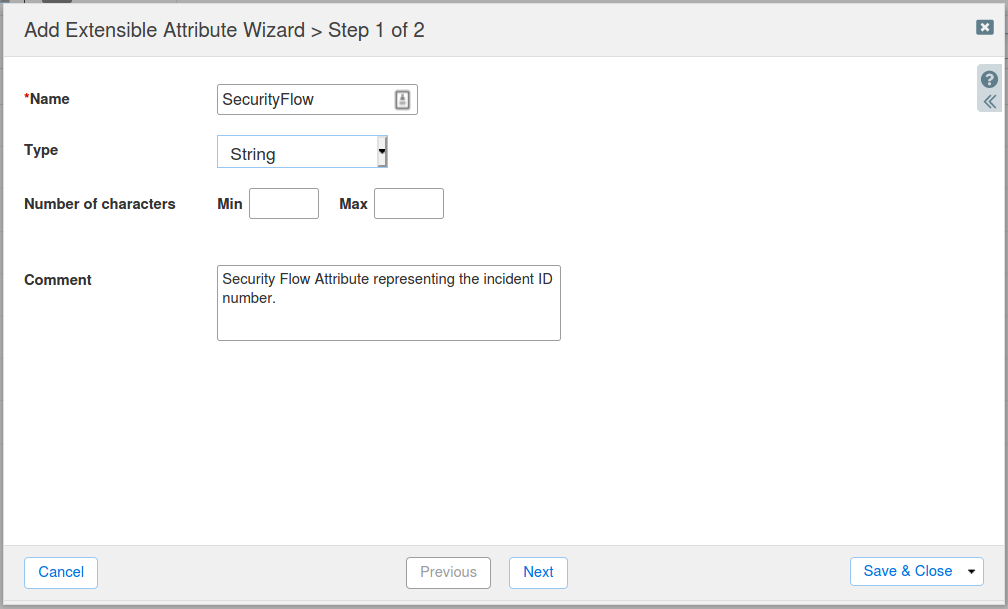
- Fill out the fields in Step 1 to define a
StringExtensible Attribute and clickSave & Close. In this example, aSecurityFlowattribute is defined.
Additional Information
See the Infoblox DDI Plugin page for details on the plugin and its capabilities. Nevelex Labs, Main Office
Metro Office Park
2950 Metro Drive, Suite 104
Bloomington, MN 55425
Phone: +1 952-500-8921
©Nevelex Labs, LLC. 2018-2026, All Rights Reserved.
EULA