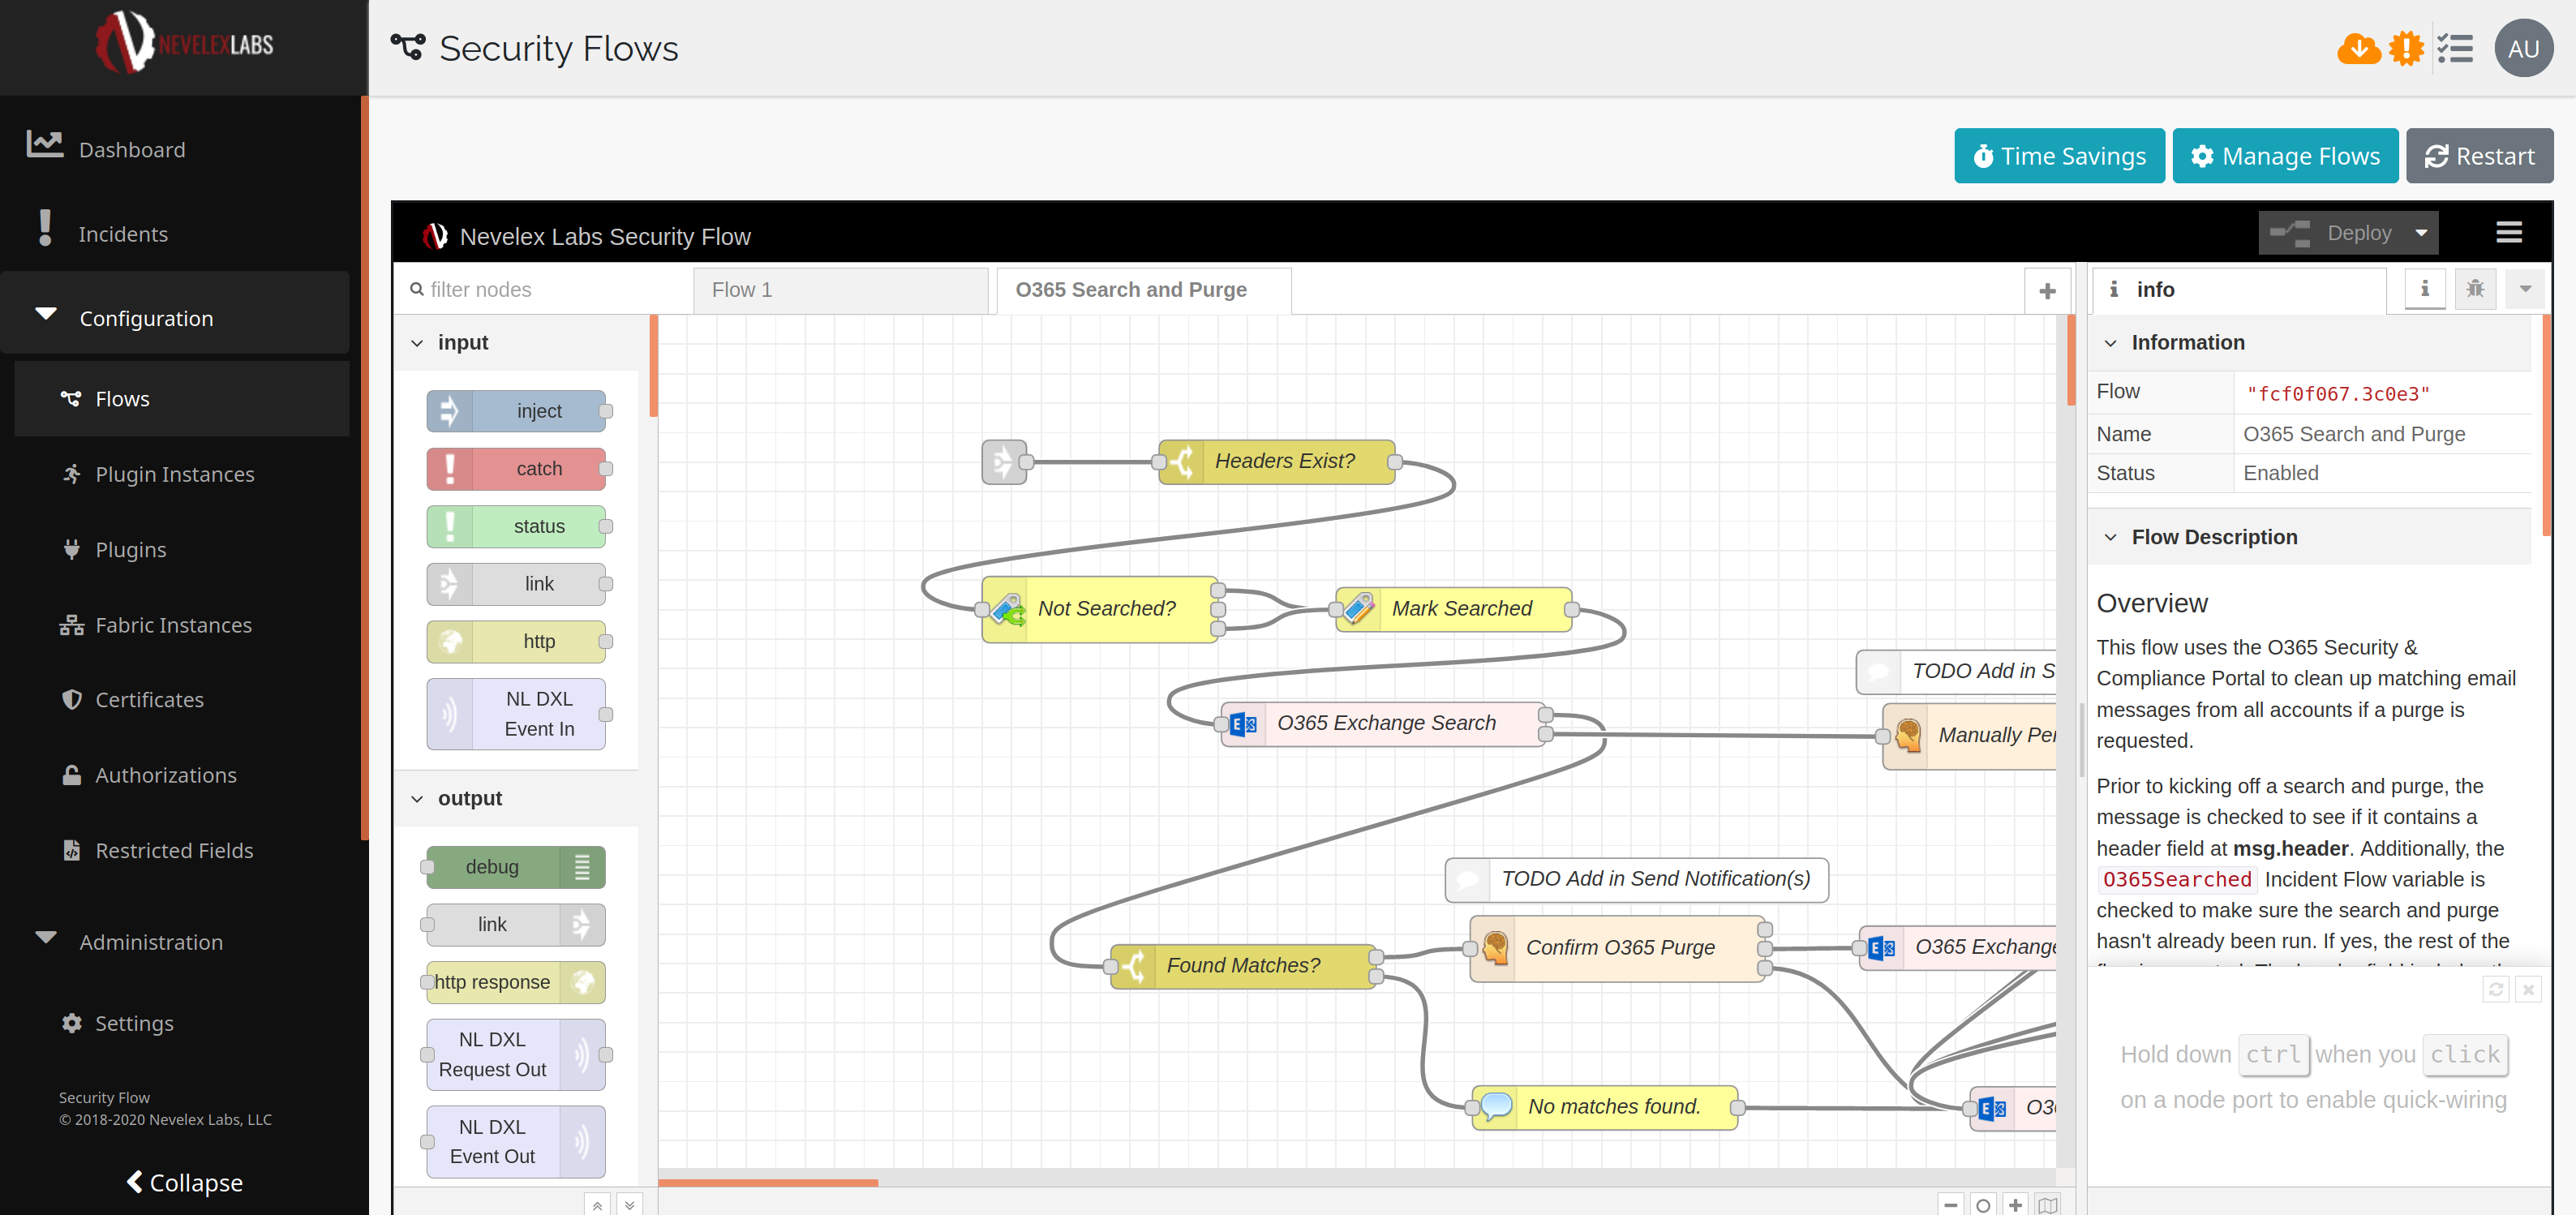
Security Flows Screen
The screen consists of a flow editor component, Time Savings, Manage Flows, and Restart options. A restart is required after uploading new plugins to ensure the latest versions of plugin nodes are running within the flows. The Flow Editor component consists of four sections:- A bar at the top, containing the
Deploybutton and the main menu. - A column on the left contains the palette of nodes available to use.
- A central workspace for editing flows.
- A sidebar on the right that has information about the flow or node selected.
Flows Engine: Based off of Node-RED
Under the hood, Security Flow uses a hardened and customized Node-RED instance supporting a number of additional features. For more information on Node-RED, please read the user's guide. Key Node-RED changes are:- Message Tracking - Infrastructure to track messages traversing the flows. Used to warn of restarts affecting existing message processing.
- Security Flow Core Nodes - An additional set of built-in nodes providing powerful extensions of functionality.
- Cross Deployment/Restart Support - New core codes and plugin nodes support the continuation of flow message processing after a deployment or restart of the flows engine. For example, the Built In: Delay Node and the Built-In: Pending Action & Sync Nodes utilize this capability.
- Curated Palette - Nevelex Labs specific palette of curated nodes. This palette is extended to include nodes requested by customers once those nodes are reviewed by the Nevelex Labs team.
- Times Savings - Association of time savings information to Security Flow nodes.
- Keywords - Association of keywords for locating flows via a search mechanism.
- Flow Visibility - Adds the ability to hide a flow to minimize the number of flow tabs for improved usability.
Test and Verify
Because of the nature of this system, flows will change the configuration of your security infrastructure. Please make sure to test and verify flows before deploying into a production environment. In the words of Uncle Ben from the Spider-Man movie, "With great power, comes great responsibility."
Main Workspace
The main workspace contains the canvas on which flows are created. It starts out empty with a background grid. Multiple flows may exist within the workspace, one in each tab. Nodes across tabs can be connected using link nodes.
Creating and Editing Flows
To create a new flow, drag a node from the left-hand palette of nodes into the workspace. Nodes are connected together by clicking on an output connection point and dragging a line to an input connection point on another node. This connection creates a path for information to flow.
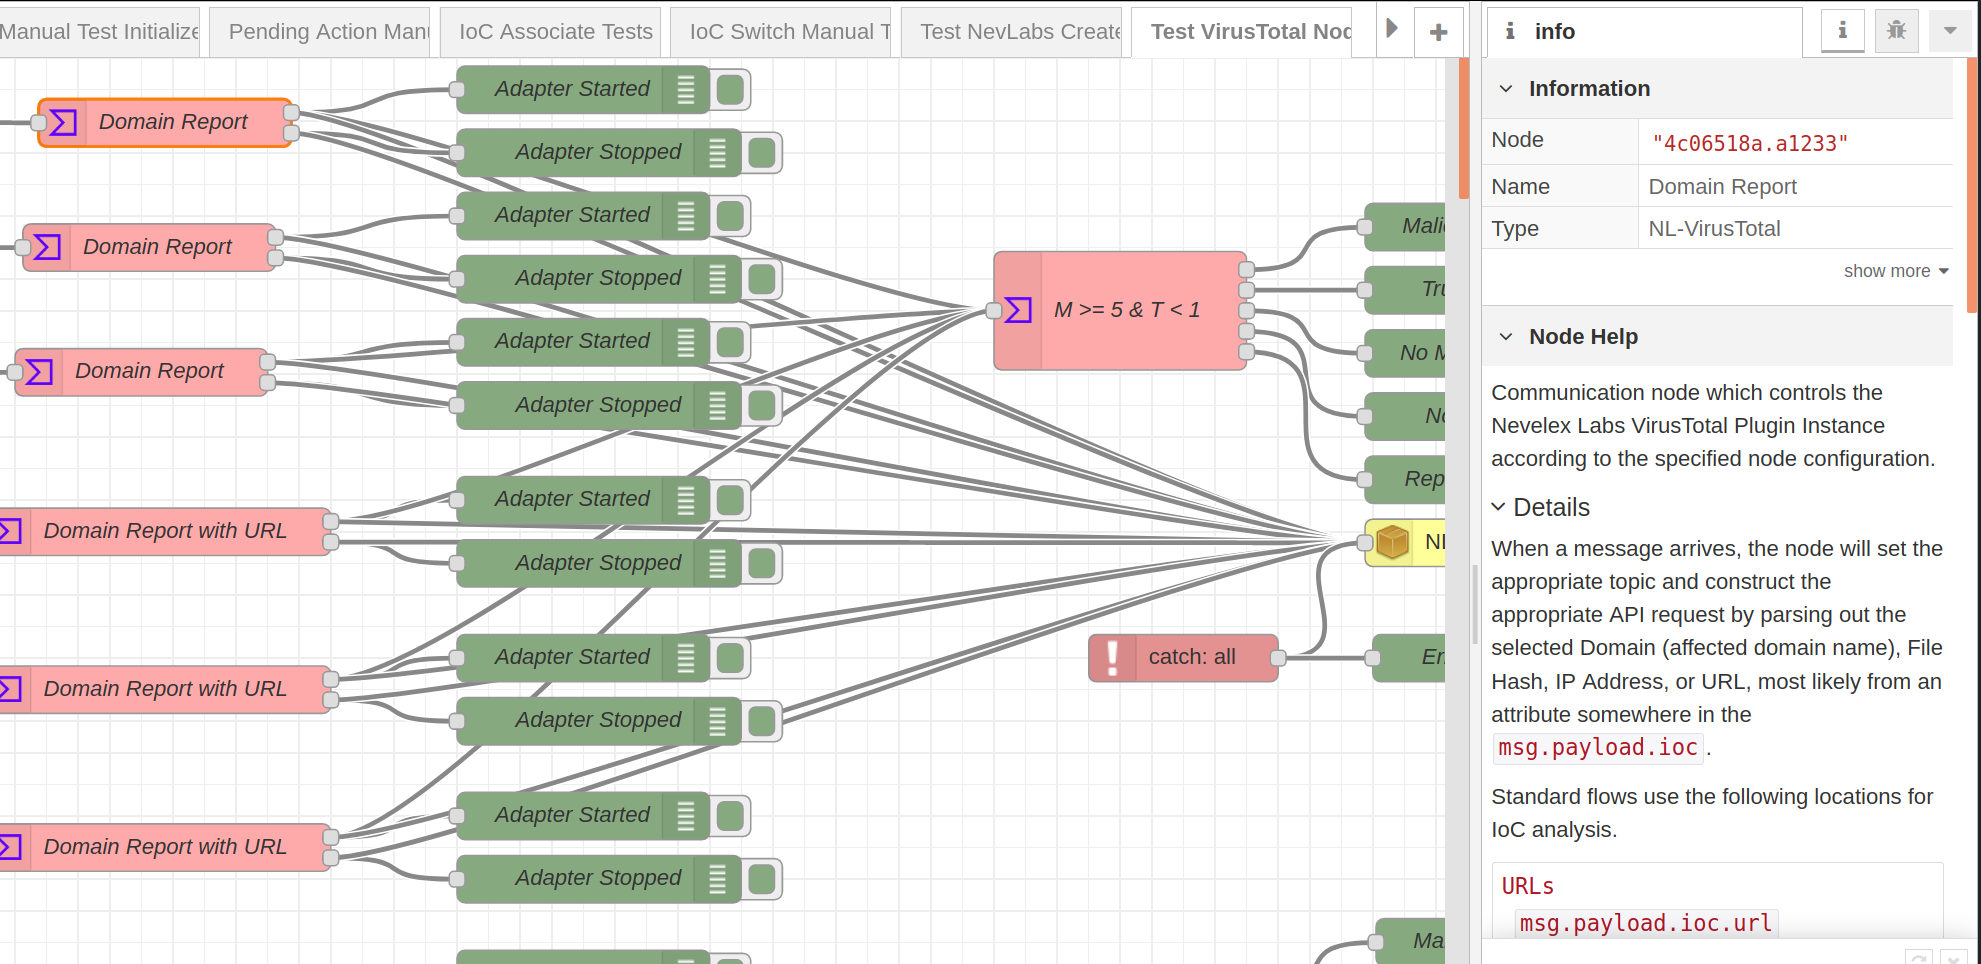
Clicking on a node will cause information about the node to appear in the right-hand information sidebar.
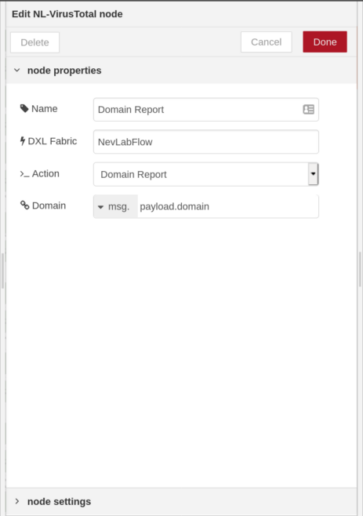
Double clicking on a node will cause the node edit dialog to appear. The node edit dialog has two sections, one for properties and another for settings. The properties section allows you to edit properties that vary from node to node. The settings section shows settings that can be set on all nodes, including the custom port labels and the icon to show for the node.
Selection
While editing a flow within the workspace, a node is selected when it is clicked on. Hold theCtrl key when clicking on a node to add it to the current selection (or remove if it was already selected). Holding the Shift key when clicking on the node will select that node and all other nodes it is connected to. Multiple nodes can also be selected by dragging a rectangle around them.
A wire is selected when it is clicked on, but it is only possible to select one wire at a time and it cannot be added to the current selection. To select all nodes on the current flow with connections, ensure the workspace has focus and then press Ctrl-a. The workspace editor supports the standard copy (Ctrl-c), cut (Ctrl-x or Delete), paste (Ctrl-v), and undo (Ctrl-z) actions. Note this is an internal clipboard, not the host OS's clipboard.
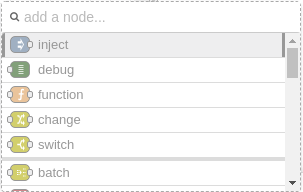
Quick Add Dialog
Hit the Ctrl key and click in the workspace to open the quick-add dialog. This allows you to select a node from a drop-down list as an alternative to dragging from the Node section:
Accessibility
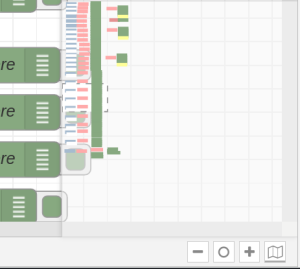
The footer of the workspace contains a few buttons. The + button will magnify the view, the - will shrink the view, and the O button will reset the view to the default zoom level. The footer also contains a button to expose or hide the view navigator. The view navigator provides a scaled down view of the entire workspace including parts of the flow not visible in the current view. A box highlighting the area currently visible can be dragged around the navigator to quickly move your view to other parts of the workspace.
Deploying Flows
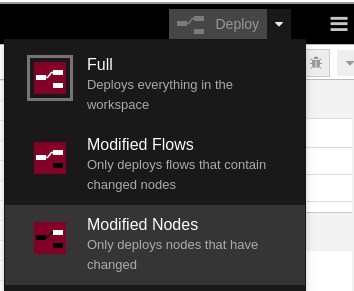
To deploy a flow that has been modified, simply hit the Deploy button on the top right-hand corner of the screen:![]() Once an existing flow has been edited, you can select the deployment mode for the flow to deploy either everything in the workspace, only flows that contain changed nodes, or only deploy the nodes that have changed. Make this selection by clicking on the down arrow to the right of the deploy button and then select from the menu provided:
Once an existing flow has been edited, you can select the deployment mode for the flow to deploy either everything in the workspace, only flows that contain changed nodes, or only deploy the nodes that have changed. Make this selection by clicking on the down arrow to the right of the deploy button and then select from the menu provided:
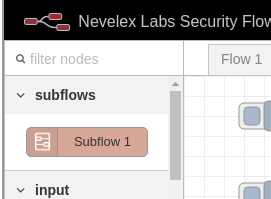
Subflows
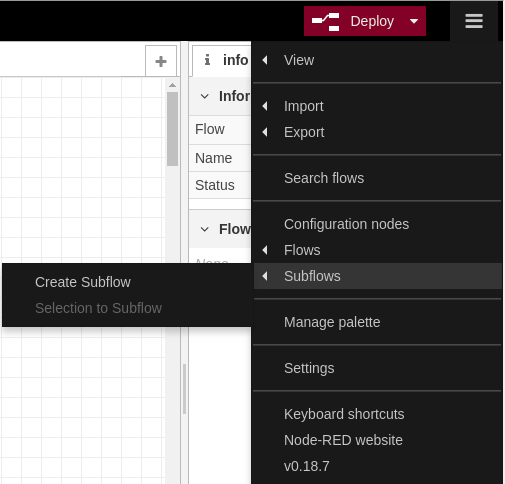
A Subflow is a flow or flow fragment (a group of connected nodes) that can be created and used as a single node in creating other flows. They can be used to reduce some visual complexity of a flow, or to package up a group of nodes as a single node that can be reused in multiple flows. To create a Subflow click on the menu bar in the upper right-hand side of the screen to expose the main menu and then select Subflows->Create Subflow. This action will create a blank Subflow and open it in the workspace. Edit this as a flow.
You can also create a Subflow from parts of an existing flow by selecting the area of the flow with the desired configuration of nodes, then from the main menu click on Subflows->Selection to Subflow. These Subflows can have only zero or one input. Once created via either method, the Subflow appears in the node palette as a single node. The inputs and outputs of the subflow are represented by the grey square nodes that can be wired into flows as any other node is wired.
Exporting and Importing Flows
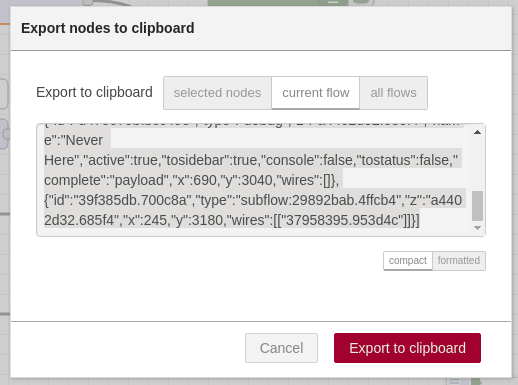
Flows can be imported and exported from the workspace, making it possible to store and share flows. Both the Import and Export functions are available from the menu on the upper right-hand side of the screen.Export
The Export dialog can be used to copy the JSON representing the flow out of the editor. The user can select to export either only the selected nodes, the current flow (including its tab node), or the complete flow configuration. It offers the option to export compact or formatted JSON. The compact option generates a single line of JSON. You can export to the clipboard or to the library.
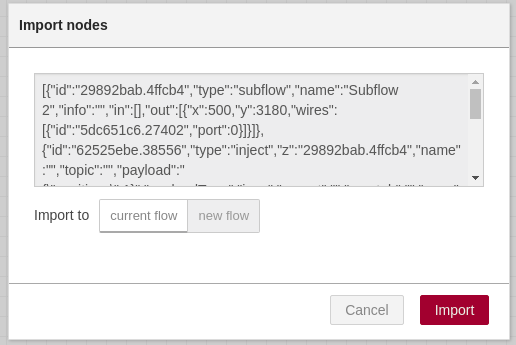
Import
To import, open the Import submenu and select Library. If you are importing from the library then select the flow. To import json open the Import dialog, select Clipboard, paste in the flow json, and click Import. The Import button will only be active if valid json is pasted into the dialog. The dialog then offers the option to import the nodes into the current flow, or to create a new flow for them.
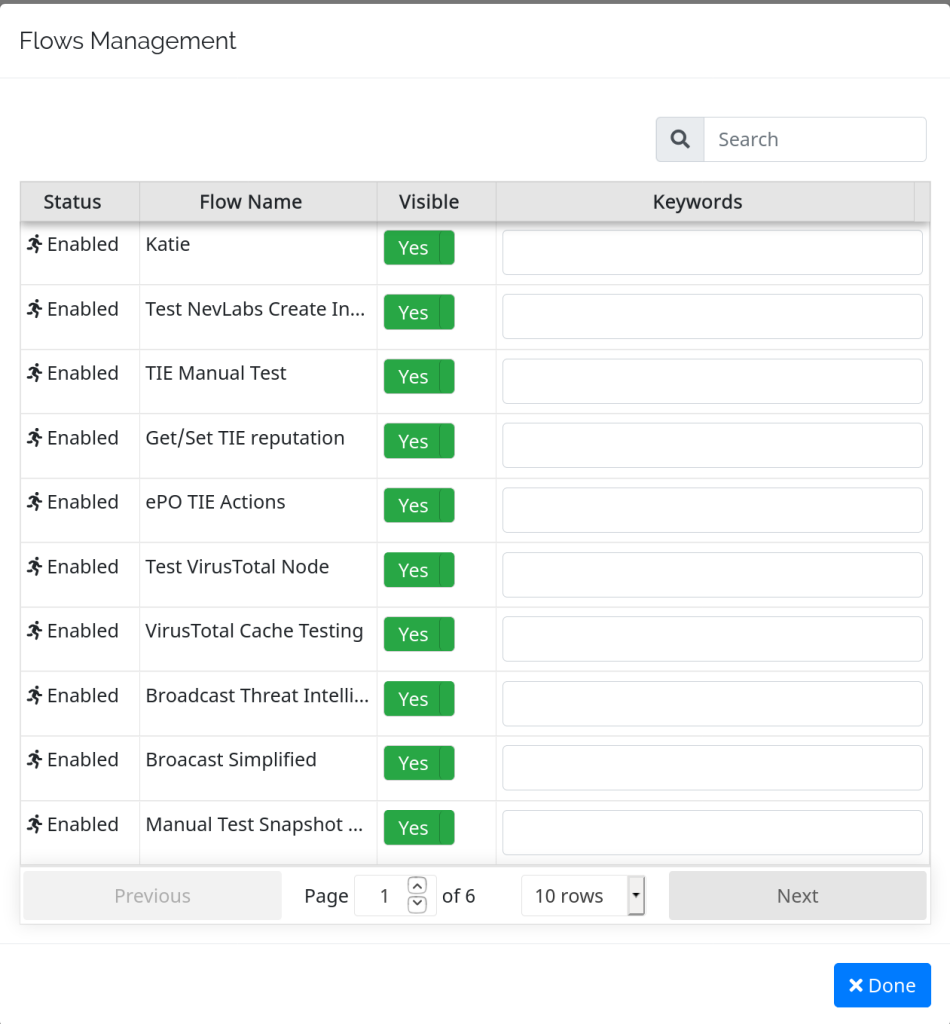
Manage Flows
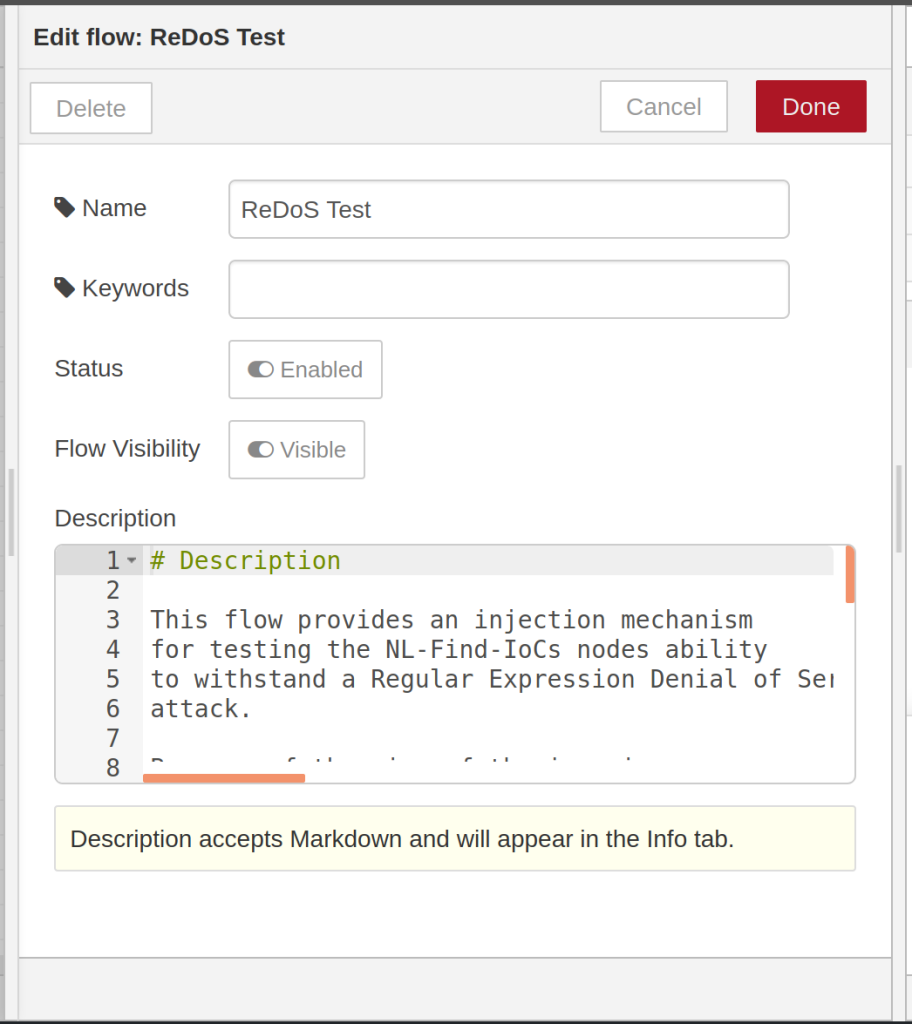
The Manage Flows option allows you to manage the visibility and keywords associated with flow tabs. To change a flows visibility click on ![]() . From there you can toggle visibility between Yes or No and assign keywords. Once you've finished, select
. From there you can toggle visibility between Yes or No and assign keywords. Once you've finished, select Done to close.
Another way to toggle visibility of a flow is to double click on the flow tab itself. Select the toggle option under Flow Visibility to hide the Flow and select Deploy to save.
Time Savings
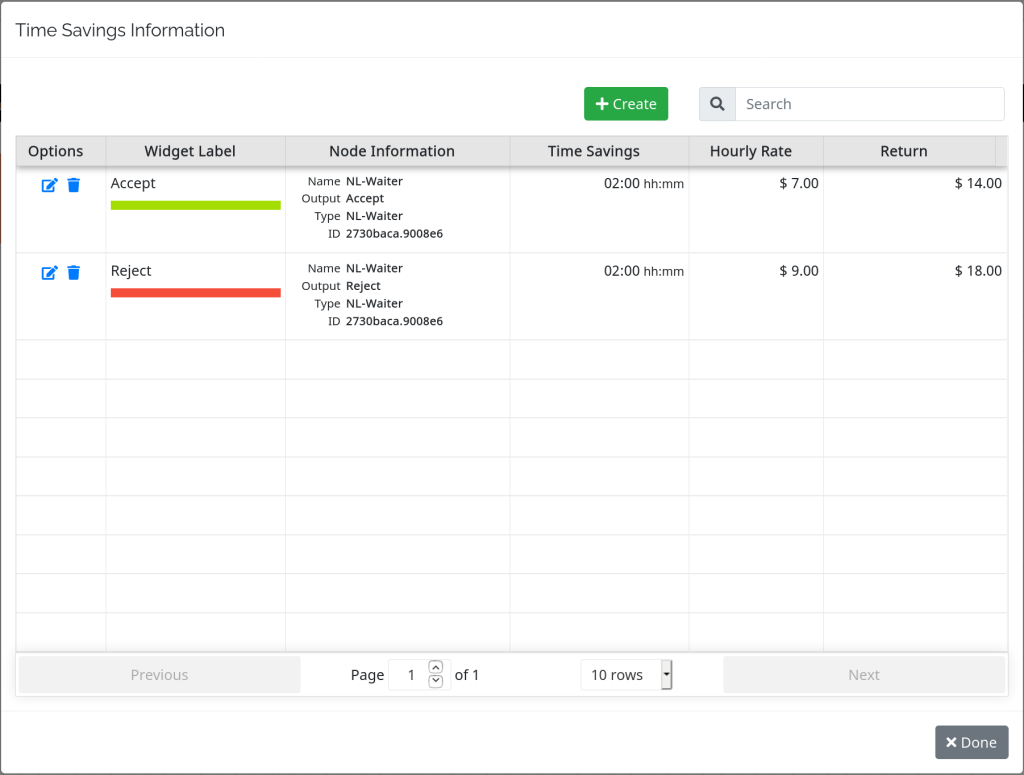
The Time Savings option allows you to manage the time savings and Return (similar to Return on Investment (ROI)) meta data associated with flow nodes. To view the most current time savings information, select ![]() button. Select the
button. Select the Create button to add new time savings information.
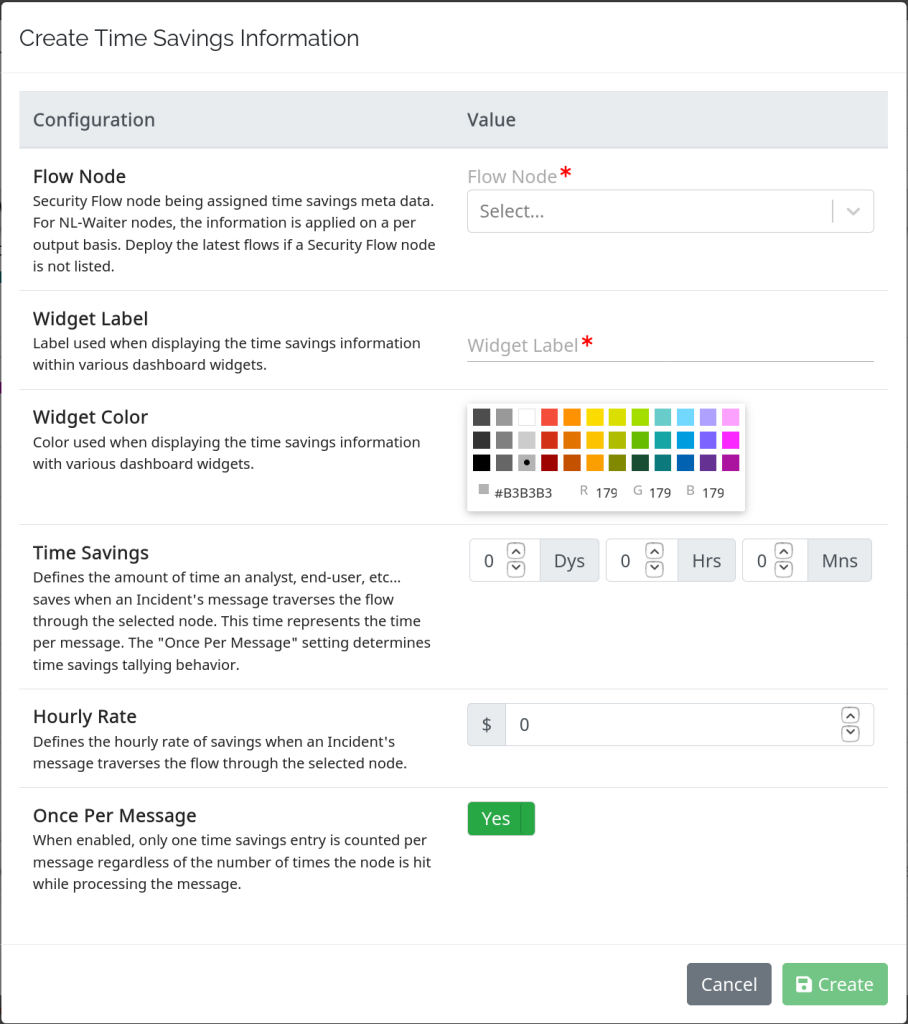
To view and manage the Hourly Rate section when creating or editing a time savings record, a user needs the Dashboard Management Views permission. The following snapshot shows the UI when a user does not have the Dashboard Management Views permission.

Once created the selected node for the times savings record is not allowed to be changed unless the node is deleted or its ID changes. A node ID changes if the node is accidentally deleted and then recreated or a cut-deploy-paste operation is performed. Deleting the times savings record removes historical information, so deletes should only be used if the historical information is intended to be removed. It is also fine to leave a times savings record without a valid node link. This scenario just means no new times savings entries will be created, but historical information will remain.
Metro Office Park
2950 Metro Drive, Suite 104
Bloomington, MN 55425
Phone: +1 952-500-8921
©Nevelex Labs, LLC. 2018-2026, All Rights Reserved.
EULA