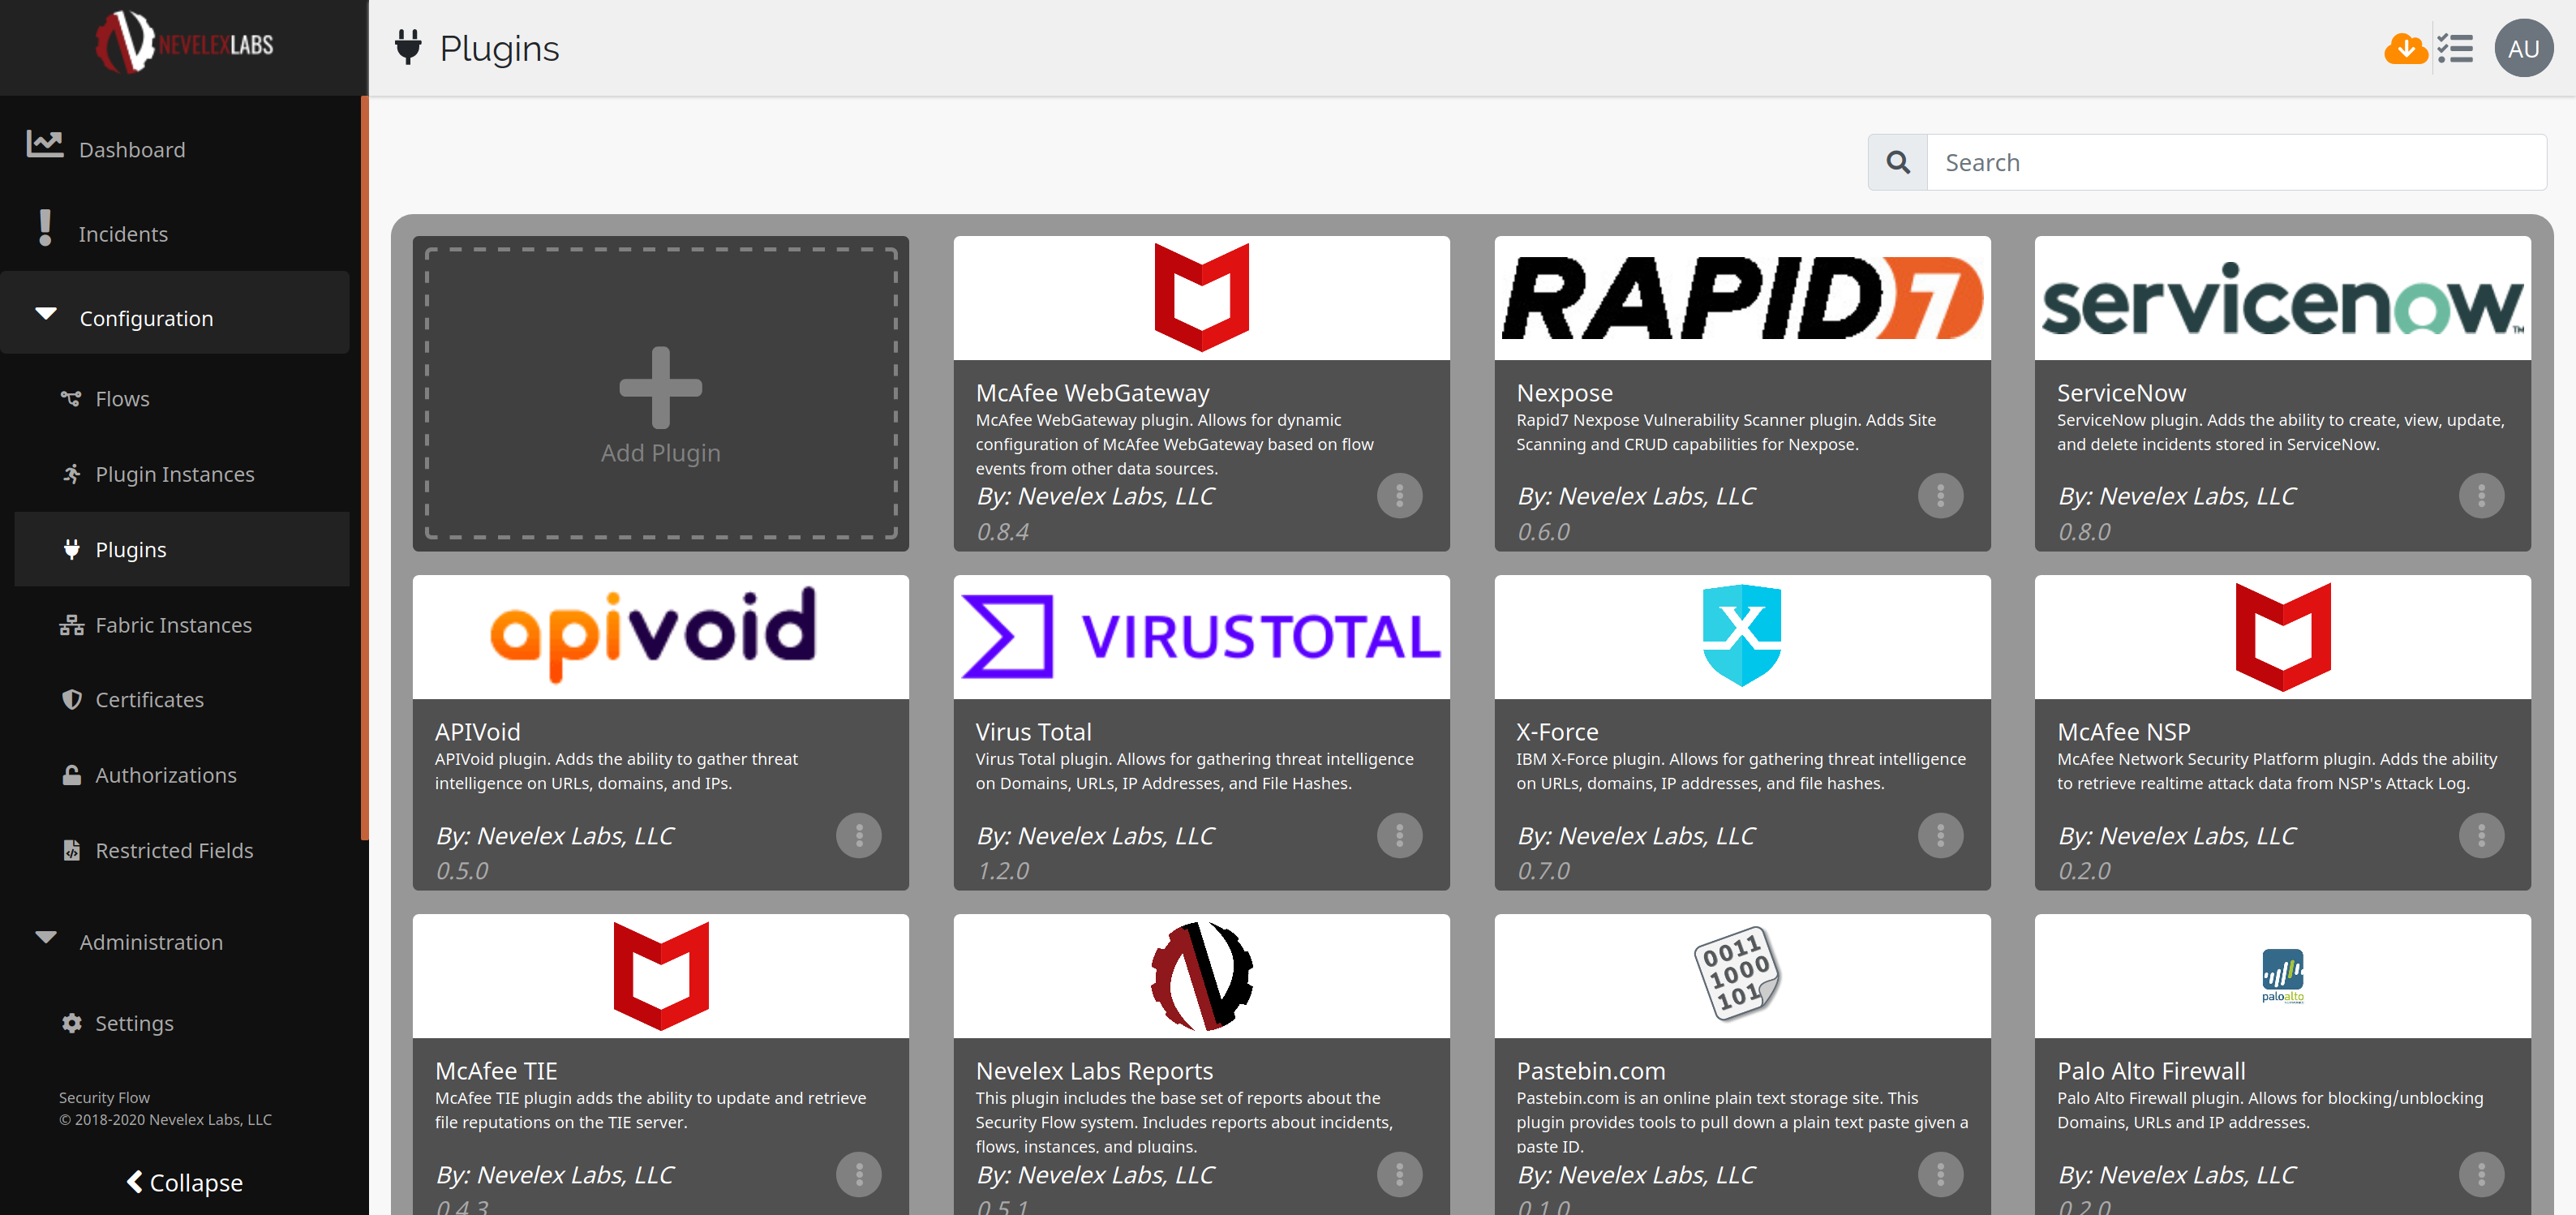
Using the Plugins Screen
The plugins screen allows for the updating of existing plugins or the upload of new plugins via the Add Plugin tile. A plugin provides an integration with a third-party product or an extension to the system, such as adding in reports for the dashboard screen. The plugins screen contains a grid displaying all of the installed plugins plus a tile to upload new plugins or update existing plugins. This page provides information about the plugins and operations to act upon. The name and the version of the plugin is shown on the tile along with the vendor logo.
Adding/Updating Plugins
Plugins are installed or updated using the Add Plugin tile, which is located in the upper left-hand corner of the Plugins panel.
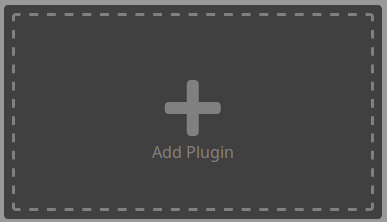
Clicking on the Add Plugin tile opens the Add Plugin pop up, as shown below. The Install Plugin section is used to install a release version of a plugin compatible with the Security Flow release. The Upload Plugin Archive section is used to install a beta release plugin or early release plugin supplied by Nevelex Labs. Dragging-and-dropping a plugin file onto the Add Plugin tile or into the file input section automatically uploads the plugin into Security Flow. The plugin files have the following naming format: [plugin_name].zip.enc. Other uploads will fail to install into the system and produce a "Plugin upload failed" message.
The Upload Plugin dialog allows the user to browse files from system to select a plugin file to upload. Upon successfully uploading a plugin or a failed upload of a plugin, a status popup appears in the lower right corner of the screen. Adding/updating plugins requires the Manage Plugin permission. (See the User Roles and Permissions Page).
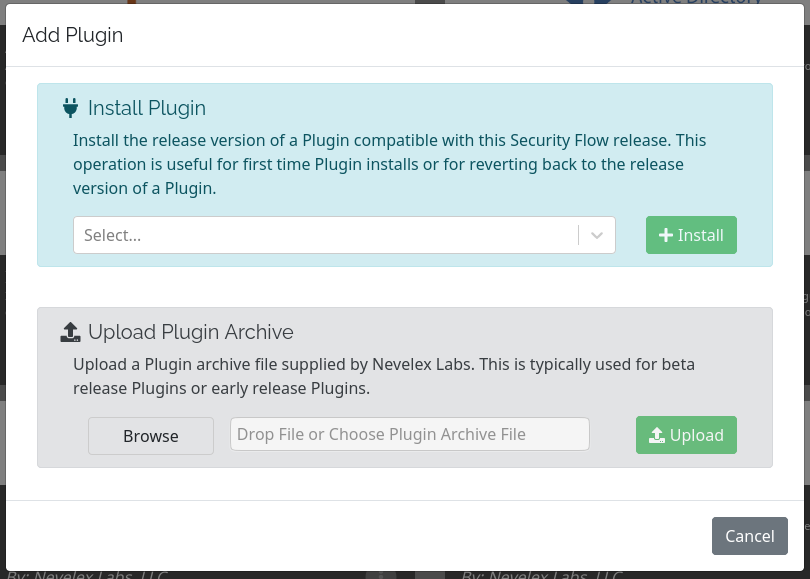
Create Instance
Create an instance of a plugin by opening the context menu via the vertical ellipsis in the lower right-hand corner of the tile and selecting Create Instance. This will navigate to the Configure New Instance page.
Delete Plugin
To delete a plugin, open the context menu via the vertical ellipsis in the lower right-hand corner of the tile and select Delete. This operation requires Delete Plugin permission and no plugin instances must exist. (See the User Roles and Permissions Page).
Metro Office Park
2950 Metro Drive, Suite 104
Bloomington, MN 55425
Phone: +1 952-500-8921
©Nevelex Labs, LLC. 2018-2026, All Rights Reserved.
EULA